Interpreted Modules
About This Guide
The interpreted modules guide contains instructions for enabling a custom module to be imported into Standard and Pro versions of Audio Weaver and found in the 3rd party tab of the module browser.
Steps for enabling custom module as “interpreted”
MATLAB
Complete the following edits to the MATLAB files of the module:
Add the line "isinterpreted = 1;" to the
<modulename>_module.m file (found in the “matlab” folder of your custom module) anywhere after the “M = awe_module(…” assignment in the “matlab/” directory of your custom module.
Add spaces around equals signs for assignment functions (see lines 34-37 in Figure 1)

Figure 1 - see line 38
Separate out functions contained in the
<modulename>_module.m file to individual .m files.

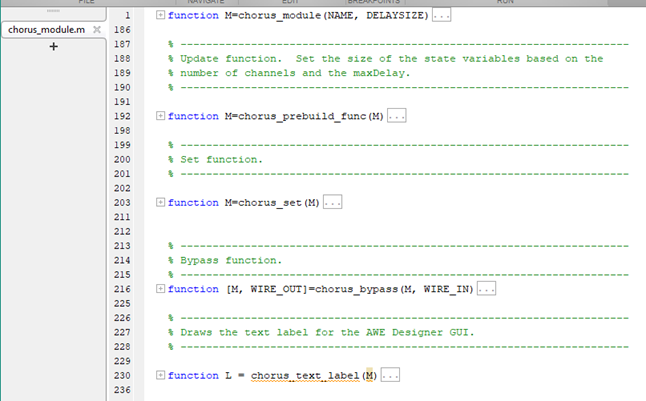
Figure 2 - Before separating functions into unique .m files
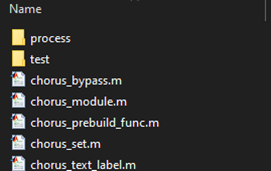

Figure 3- After separating functions into unique .m files
NOTE: Confirm there is a corresponding .m file for any function being defined, otherwise comment out the definition. For example, this module was failing because there was no corresponding “chorus_process.m” file. Commenting out line 35 fixed the issue.

Figure 4 - Comment out any unused function definitions
Move any module function up to the same folder as the <modulename>_module.m
Run “make_<modulename>_pack(1)” to create the updated .c and .h files.
NOTE: Setting “isInterpreted=1” in your module.m file will prevent breakpoints in your module’s MATLAB code from working properly. If you need to use breakpoints in your module’s MATLAB code, set “isInterpreted=0” to allow debugging and then change that value back to 1 before your final build of the module.
Building the module
Build the module, and before launching Designer, move or copy the created .dll file into the same directory containing AWE_Server.exe (typically located in <install directory>/Bin/win32-vc142-rel/)
Set Module Path in Designer
In Designer Standard, go File-> Set Module Path, then click Add Folder, select your custom module folder, and click Select Folder. Your module should now show in the modules tab and load into Designer.
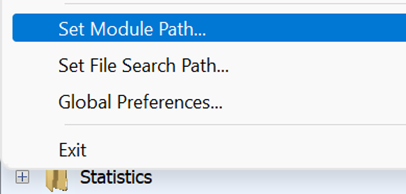
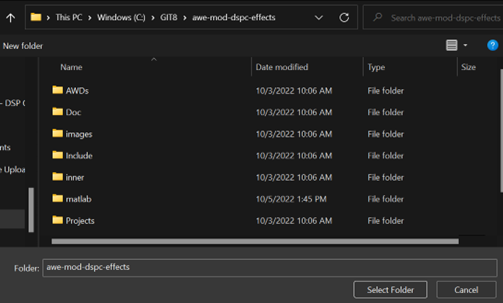
Figure 5- Add Module Path
Your module should now show in the modules tab and load into Designer.
Sharing the module securely
Not all files used to create a custom module are necessary to have present when running the compiled module. The Mod<XYZ>.c and inner<XYZ>.c files may contain sensitive source code, but can be removed from the file path before sending and the custom module will still work.
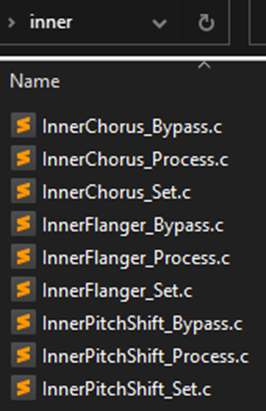
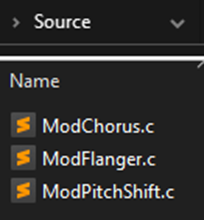
Figure 6 - Removing Source and Inner c files
