
Deploying Custom Modules to BareMetal Targets - RT685 Cortex-M33
Overview
This document describes how to deploy a custom module which runs on a “native” PC system to a baremetal system. The NXP EVK-MIMXRT685 evaluation hardware with a board support package from DSP Concepts and related toolchain are used as an example, but the concepts should be applicable to other embedded environments.
Prerequisites
Functioning custom module as outlined in “Audio Weaver Module Developer’s Quick Start Guide”
RT685 EVK
NXP MCUExpresso IDE
MIMXRT685S SDK from NXP
RT685 BSP from DSP Concepts with AudioWeaver library integrated
Assumption
This guide assumes you already have a custom module which is functioning under a “native” target using DSP Concepts Custom Module Creator. If you do not have this, build the custom module according to the instructions in the “Module Developers Quick Start” and the “Module Developers Guide”.
Create or Obtain BSP
You need to be able to build and run the BSP for your embedded target and include AWECore on it as described in "AWE-Core--Integration-Guide.pdf". Once you have a working BSP with AWECore integrated, passing audio, and communicating on the tuning interface you can proceed to the next step.
This document uses the ‘NXP RT685 - USB Voice Processor’ demo kit BSP. Please contact your DSP Concepts Sales Rep for access.
Build and Flash Unchanged BSP
If you received the BSP source from someone else, you should build and flash it without any changes to verify you have all the tools set up prior to moving on to building your custom module library. You can skip to the next section if you are sure the build environment is functioning.
Follow the document included in the BSP under .\SampleApps\RT685EVK\Doc\ RT685EVK_BSP_setup_and_use.pdf. That document covers:
Initial setup of the Evaluation kit hardware including setup of the jumpers
Installation of NXP MCUXpresso
Installation of the MIMXRT685S SDK from NXP
Opening and configuring the Audio Weaver enabled BSP
Building the BSP source code
Flashing and debugging BSP source code using the on board J-Link debugging interface
There are additional topics in the document such as configuring IAR Embedded Workbench and building HiFi4 binary using Xtensa tools that may also be of use depending on your goals.
Build the Static Library which contains your custom module code
Now you are ready to start integrating the custom module.
Create an empty static library project
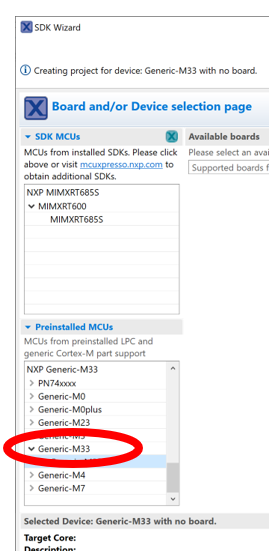
New -> C/C++ Project
Select Generic-M33 and click next
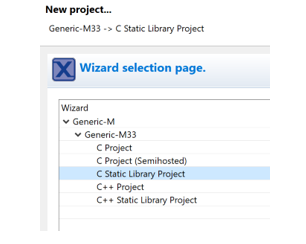
Select “C Static Library Project and click “Next”
Enter a name for the project (e.g. “MyCustomModule”) and click “Next”
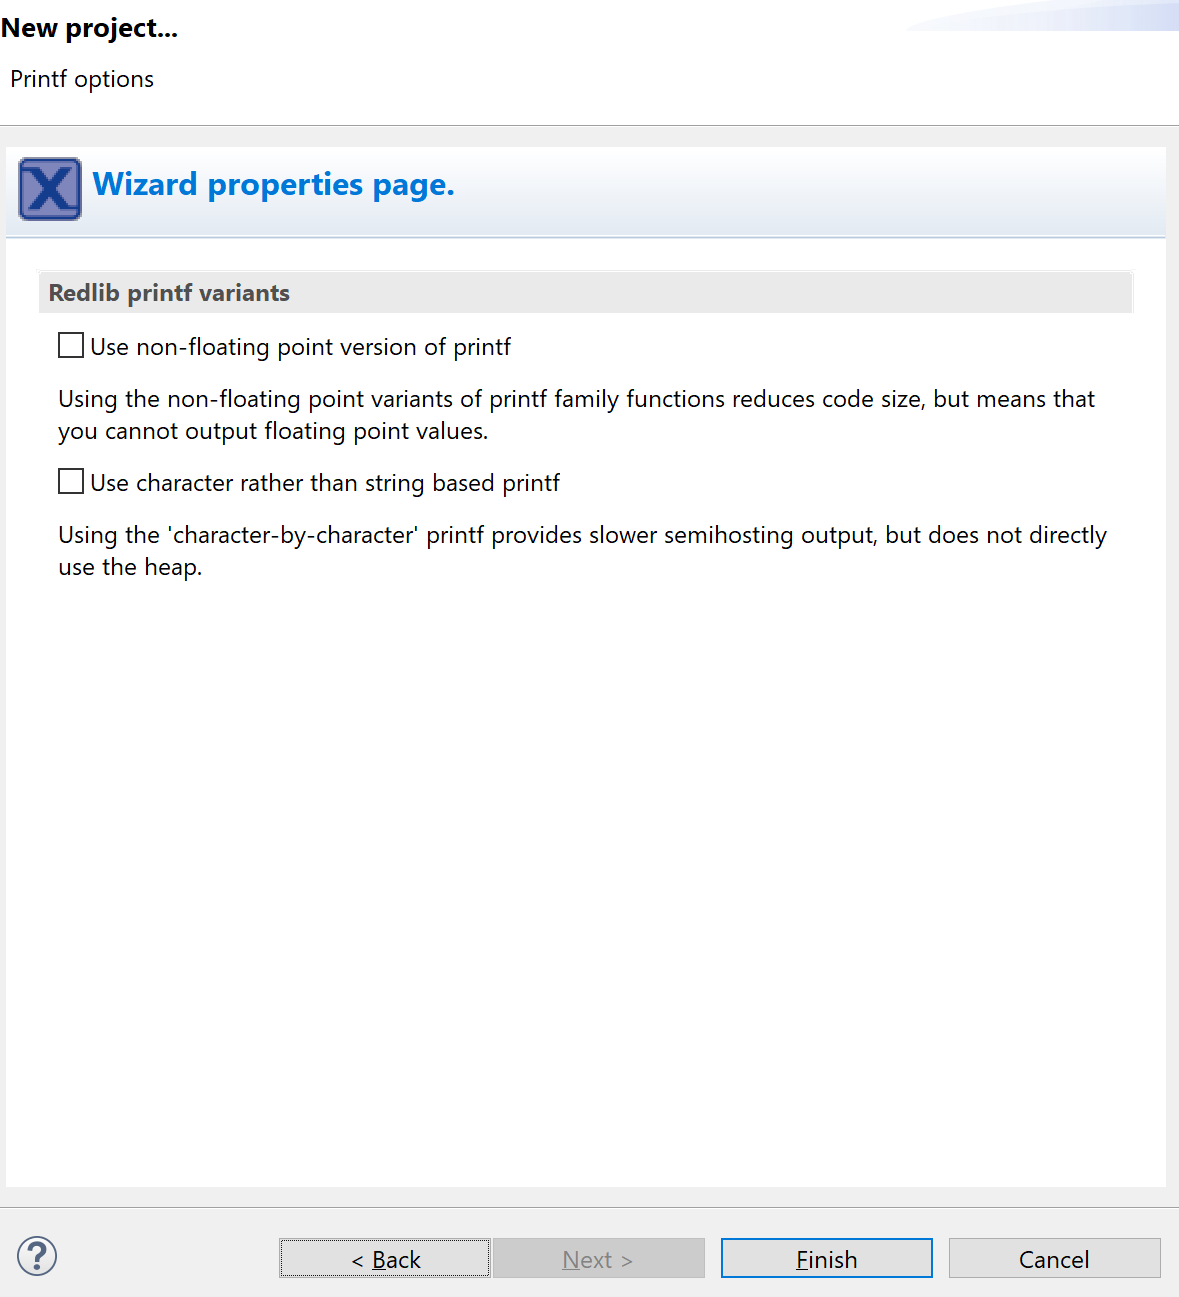
Accept the defaults for Hardware FPU and Project Structure on the next page and click “Next”

Click Finish
Copy custom module files into the project
In Windows File Manager, copy the generated custom module files in step 1 into the static library project folder location*:
"<CustomModuleDirectory>\source\Mod<YourCustomModuleName>.c" -> ".\src"
".\include\*" -> ".\inc"
(NOTE: If you need to make any changes to your custom module, recall you will need to re-generate these files per step 1 and copy the updated files again. Also, any SDK APIs for the target environment you need to call from your code must be conditionally compiled in the "inner" files.)
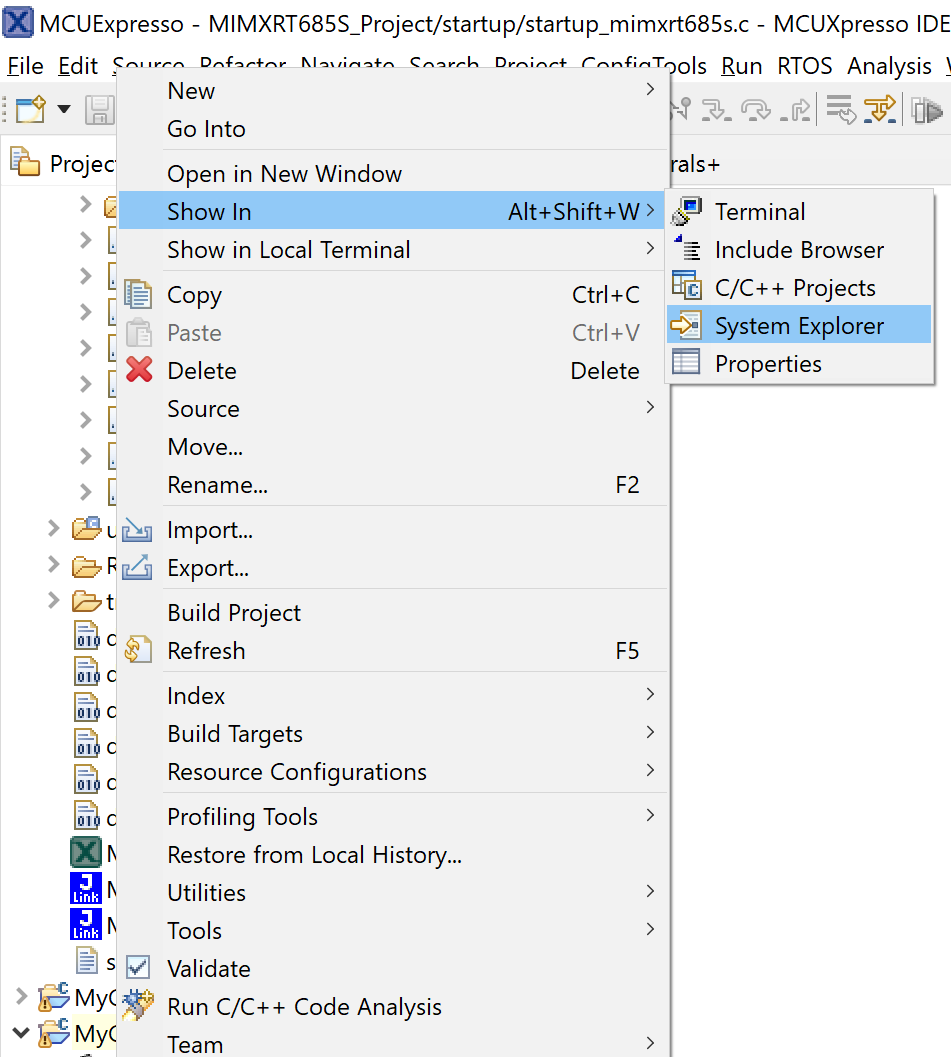
*Hint: right click on the src folder name in Project Explorer, select “Show In > System Explorer” to get right to the src and inc folders.
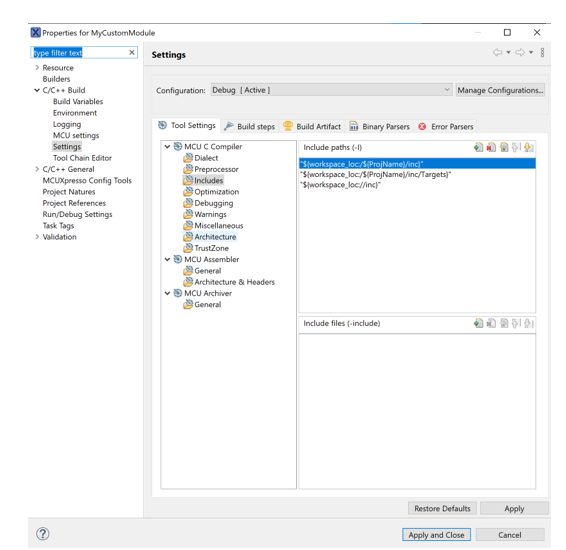
Edit the properties of the project to include the ‘Targets’ include folder:
Navigate to “Project > Properties C/C++ Build > Settings > Tool Settings > MCU C Compiler > Includes"
Click the plus icon to add a new include path, choose from workspace, .\inc\Targets.
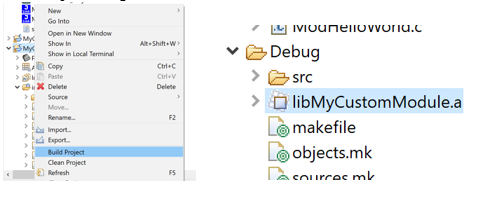
Right click on the project and select Build Project. If the build succeeds, you should see the ‘lib<MyCustomModule>.a’ under the Debug or Release folder in the Project Explorer.
Add the custom module static library to the main BSP project
There are many alternatives to include the library into the BSP. What is shown here should be modified to suit the workflow of your project.
Configure the linker to include your custom static library.
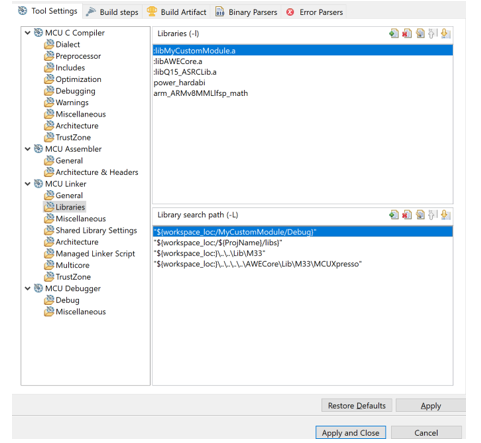
In the BSP Project, navigate to Project > Properties C/C++ Build > Settings > Tool Settings > MCU Linker > Libraries.
Click the green 'plus' icon add the name of your library. Note, you must add a colon in front of it (e.g. ' :libMyCustomModule.a ')
Your static library must be in the search path. You can copy your static lib to the current search path, or modify the search path to include your static lib. Pick one of the options below:
Copy the static library .a file:
This method may be useful if the BSP builder receives a precompiled library from another source.
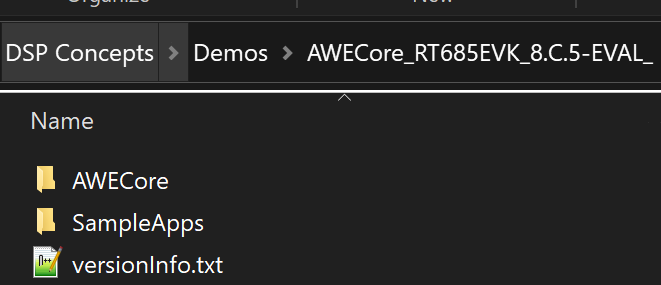
Using Windows File Explorer, copy the static library *.a file to the same location as libAWECore.a. libAWECore.a is in the AWECore folder of the BSP. You must navigate up some directories from the SamplesApps/MCUExpresso project:
If you do not want to manually copy each time you recompile the static library, you can modify Search Path for the BSP project:
This method may be preferred for the author of the custom module performing testing prior to release. This is what was done in the picture for step 2.
On the MCU Linker > Libraries panel, click the green "+" icon by Library search path and point to the output location. It may be convenient to use the 'Workspace' option to include it.
Modify .\SampleApps\RT685EVK\Source\ModuleList.h header file in main BSP project to include your module in two places:
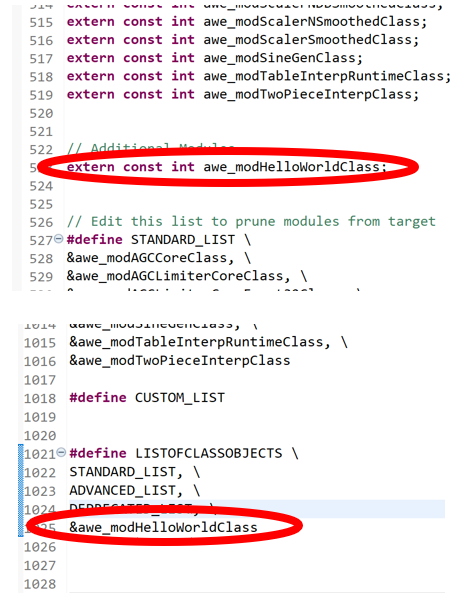
ModuleList.h will not show up in Project Explorer, you will need to locate it using Windows File Explorer or another method.Clean + rebuild + flash the BSP
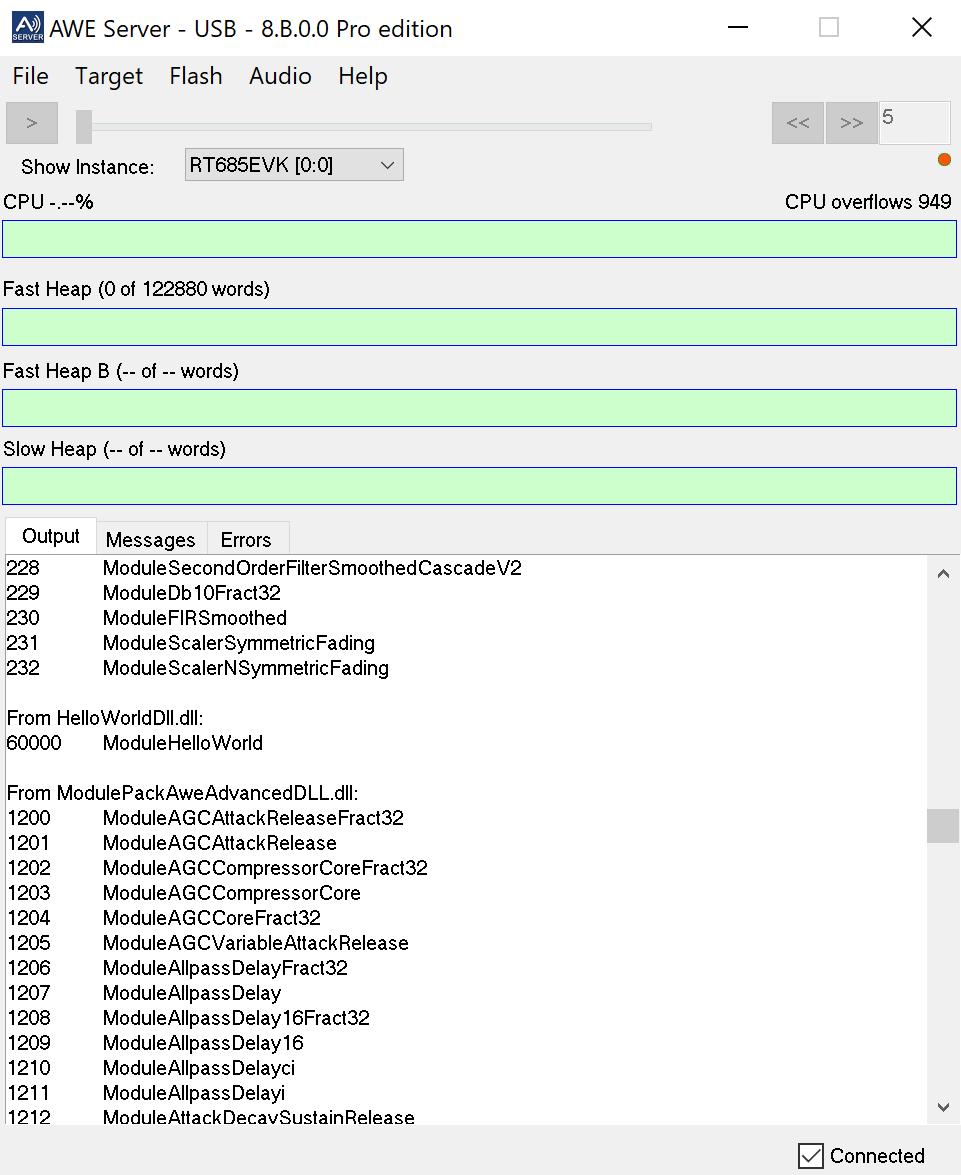
Connect Audio Weaver Server to the embedded target
Check that your module shows up in List Modules
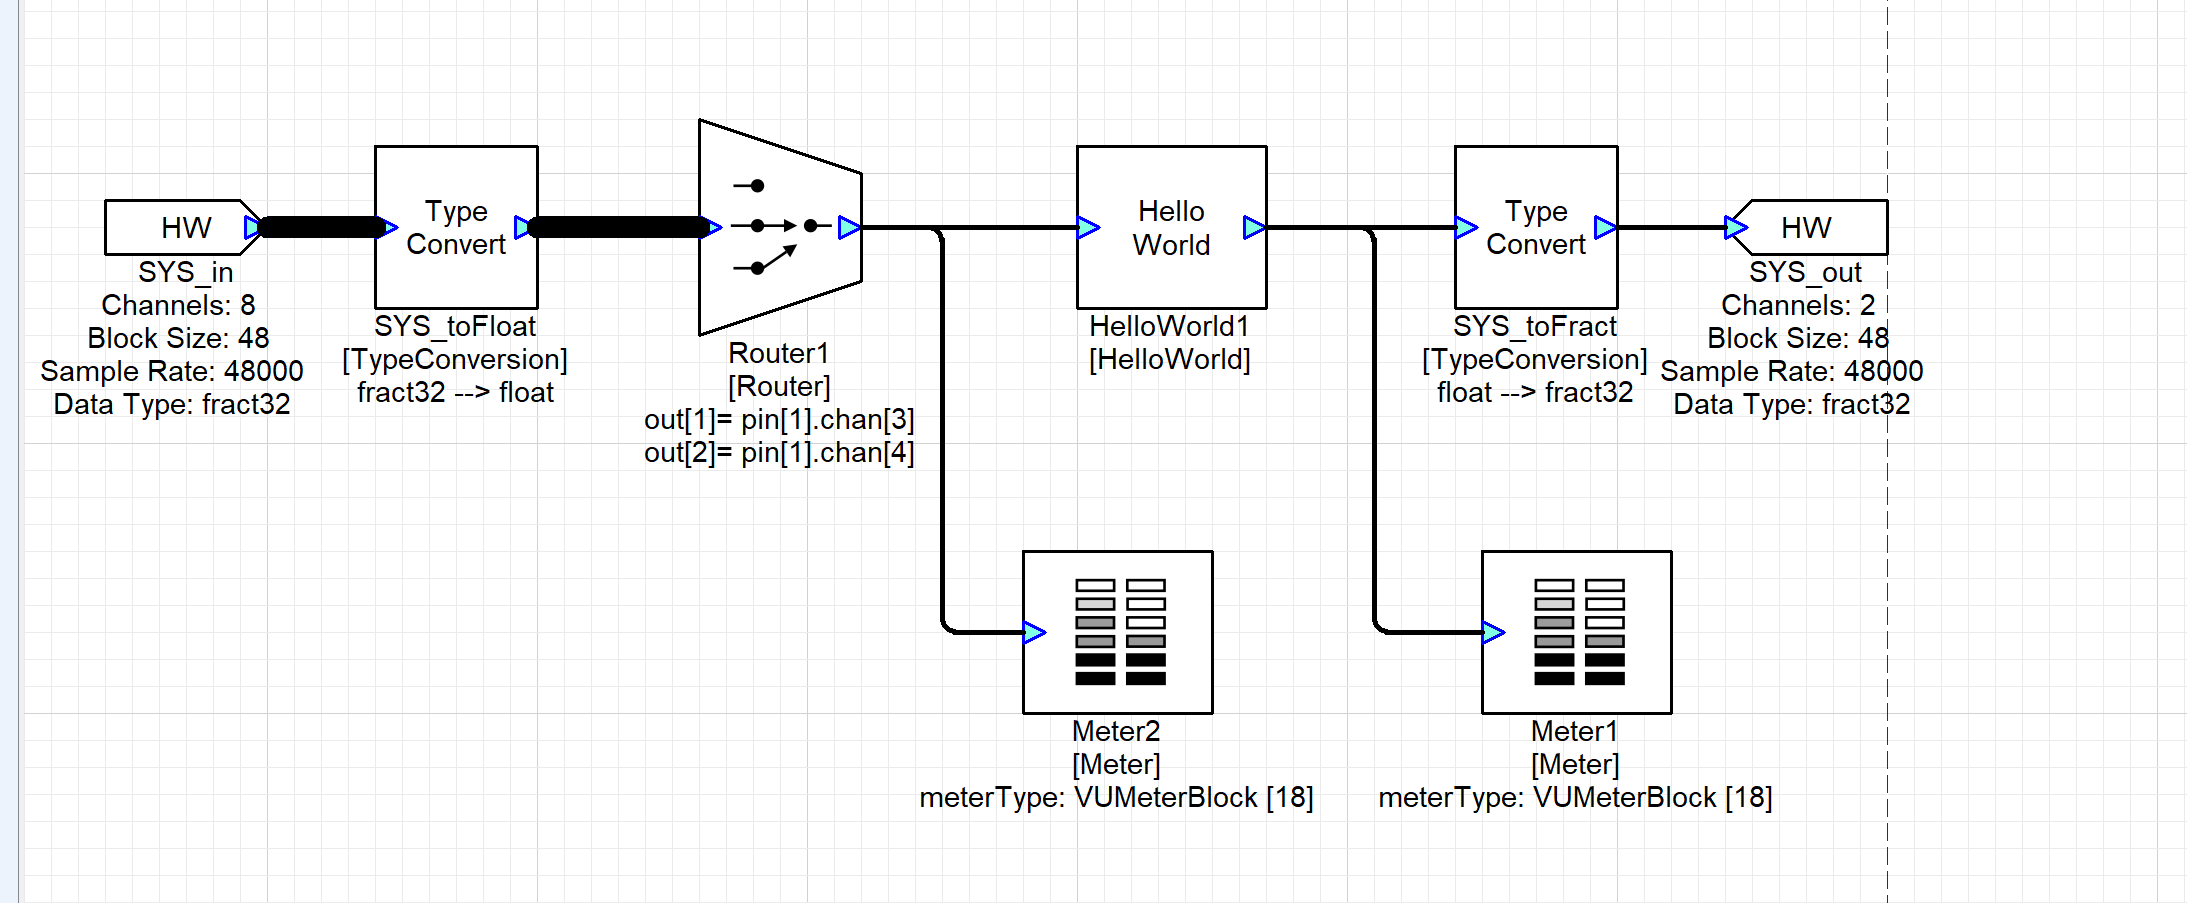
Add your custom module to a layout and verify functionality
Appendix
Set up the J-Link debugger
If it's not already been done, you have to reprogram a chip on the board as a J-Link debugger. It comes programmed as a CMSIS debugger in stock configuration. Details are contained within the SDK in "Getting Started with Xplorer for EVK-MIMXRT685.pdf", but the key steps are:
install LPCScrypt (it can be found on the NXP website)
Remove all power to the board
Set the JP1 jumper to short the pins (it should be open by default, it is near the J5 USB port)
Plug in the J5 USB port
Navigate to the scripts folder in the LPCScrypt install and execute 'program_JLINK.cmd'. It should give you a success message.
remove the short on JP1 and dis/re-connect the J5 USB to cycle the power.
Now when you get to 'Build and Download' Step 9 in ''RT685EVK_BSP_setup_and_use.pdf" you can program the flash as described.
Now you can follow ''RT685EVK_BSP_setup_and_use.pdf" provided with the BSP.