
Subsystems in Audio Weaver
About This Guide
This Application Note explains the use of Subsystems in the Audio Weaver Application.
Adding a Subsystem
You can add a subsystem in two ways:
Drag the “Subsystem” module from the module browser into your layout, then click into it and start adding modules and system pins. Go back to the top level to add connections to the Subsystem's pins. You can also cut (or copy) and paste modules from other parts of your layout into a subsystem.
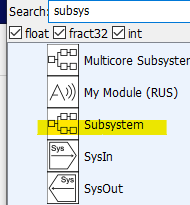
Figure 1. Subsystem in Module Browser
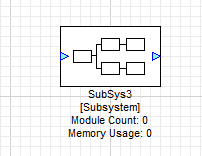
Figure 2. Subsystem module in layout
Select a group of modules and connections, then right click and select “Convert to Subsystem” from the popup menu. Pins will be created wherever your drag box crosses wires.
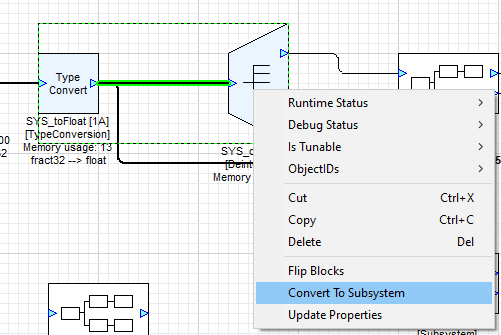
Figure 3. Highlighting a group of modules and wires
Existing connections are maintained through system pins.
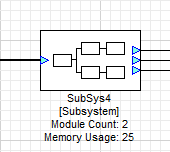
Figure 4. System pins
In the subsystem, system pins are created for all connections to the next higher level.
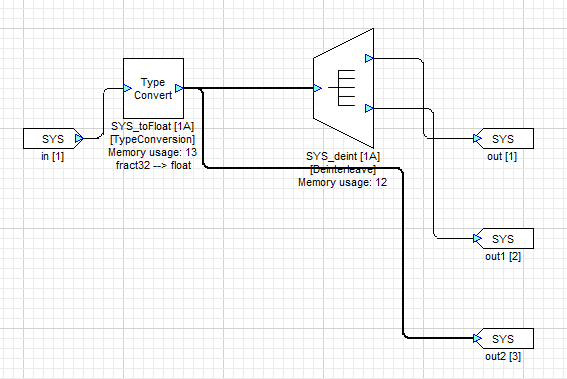
Figure 5. Subsystem detail
You may find it helpful to rename the default pin names for better clarity. Note that by default, pin names are not shown on the subsystem module at the next level up. However, if you rename a pin, its name will be shown. In the example below, pin “in” has been renamed to “in_1”, while “in1” has been renamed to “in_2”.
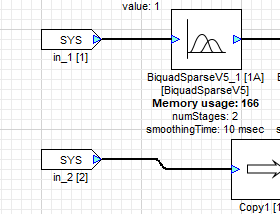
Figure 6. Renaming pins
The modified names now appear on the module at the next higher level.
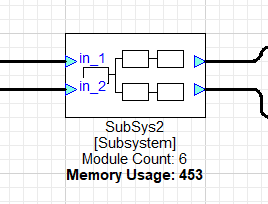
Figure 7. Changed pin names will appear
Adding Pins to a Subsystem
If you wish to add additional input or output pins to a subsystem after creating it, use the SysIn and SysOut modules, respectively.
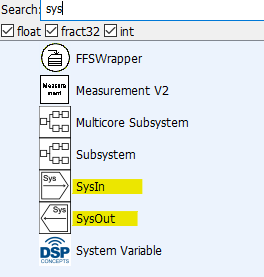
Figure 8. System pins in Module Browser
After dropping in a pin, proceed to make connections to your other modules as usual.
Layout Hierarchy and Subsystems
When your Audio Weaver layouts start getting larger, you may wish to move sections of them to a new page. You can create “Subsystems” which are groups of modules moved off the top page and represented by a smaller rectangle just like a single module. There are two main reasons to do this:
To improve the visual organization of processing functions. By creating subsystems, groups of modules are pushed down in the design hierarchy and replaced by a single subsystem block.
To identify groups of modules which can be re-used.
Subsystems are shown as tabs in the layout area once they are opened.
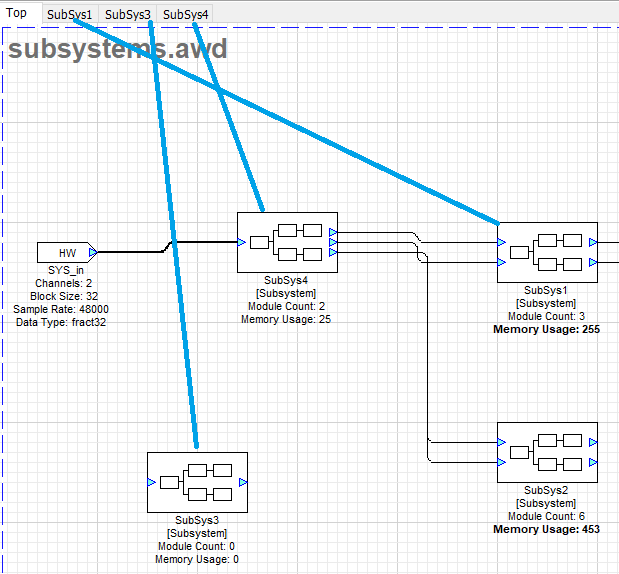
Figure 9. Layout tabs and subsystems
Subsystems can in turn contain additional subsystems resulting in a multi-level layout hierarchy. Double click on a subsystem block to go deeper into the hierarchy. To navigate to the next higher level, right-click on the layout canvas and select “Navigate Up” from the popup menu.
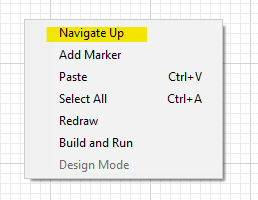
Figure 10. Navigate up
Using ParamSet and ParamGet
ParamSet and ParamGet modules allow you to control internal variables of modules without requiring a pin. To reference a variable at the same level of hierarchy as the ParamGet or ParamSet module, simply use the module name and the variable name as shown:

Figure 11. Setting the target module and parameter
You can also specify modules that are within subsystems using:
Subsystem.Mod.Var
You can also go up in hierarchy and control modules that are in an upper system. Use a single backslash character to move up one level in the hierarchy. Use multiple backslash characters to traverse multiple levels of hierarchy. Suppose that the ParamSet module is located in:
SYS.Subsystem.ParamSet
and you want to control the variable
SYS.Scaler1.gain
Then set the Mod.Var field to
\Scaler1.gain
Using a Copier Module
You may design a subsystem that passes an input pin directly to an output pin without any intermediate processing. If so, you will need to add a “Copier” module for the layout to be instantiated correctly. This Subsystem will generate an error:
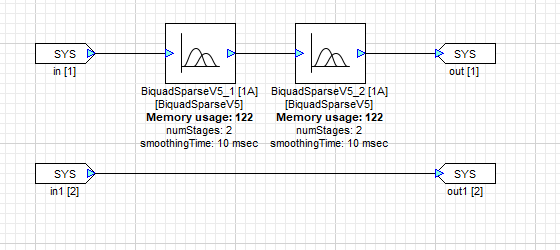
Figure 12. Pass through signal in subsystem
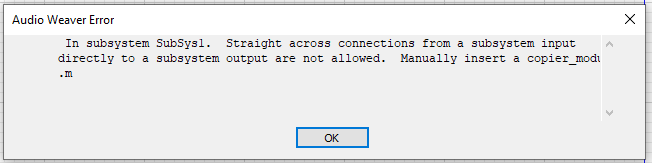
Figure 13. Error Message
Adding the Copier module prevents the error. The Copier module uses a small amount of memory, so unless this pass-through signal being part of the subsystem is necessary, it would be better to avoid it.
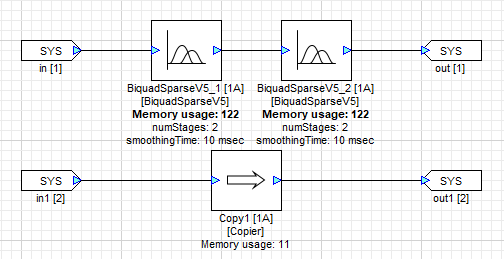
Figure 14. Add a Copier module
How the system gets flattened when built
The concept of Subsystems in Audio Weaver allows you to better organize your layouts and re-use groups of modules to save you time. When you instantiate a layout (e.g., “Build and Run”), the references between the different pages in the Audio Weaver layout are resolved, logical connections are made, and the instantiation proceeds until all paths through subsystems are completed. Functionally it is no different than if you had put all the modules on a single page. Well, almost.
Most of the time, you do not need to treat modules in subsystems any differently. However, if you are using “ParamSet” or “ParamGet”, you do need to use the full hierarchical path to the Module. This is discussed in detail here ParamSet.